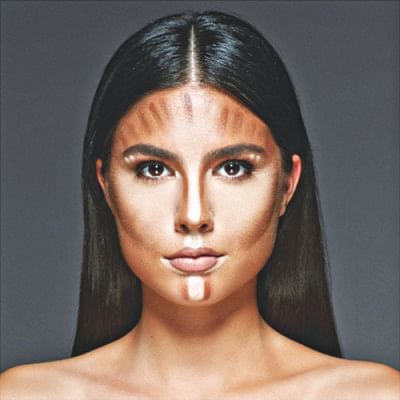
Cream contouring made easy

Probably, there has been times when you were really feeling yourself, wanted to look extra chiselled and followed your favourite Guru with her contouring techniques, only to find out that instead of looking flawless, your efforts turned out muddy, patchy and unblended!
Relatable? This happens to the best of us. The following is a complete step-by-step guide on how to actually cream-contour in practical life. So, let's begin!
STEP #1
Take good care of your skin. You have probably read this everywhere by now, but a flawless skin really does help you to get that immaculate base. If you have acne prone skin or have dark spots, chances are, your contour will turn out really patchy and uneven. Therefore, skincare comes first.
STEP #2
Use a product that's 3 to 4 shades darker than your skin tone, but not more than that for a naturally-chiselled look! Also, choose something that is not too red, or too grey, but with more of a neutral undertone.
STEP #3
Use a brush to apply the product. This is the step that will make or break that contour.
Do not go in straight with the product and start drawing lines like all the Beauty Gurus on Instagram. Take some product onto a dense synthetic/stippling brush, and then, dab the brush on your hand for a few times to get off the excess product. This will make sure you do not go overboard with the contour, thus making it a lot easier for you to blend really well.
STEP #4
Find the hollows of your cheek and place the product on there. Here's a small tip for you! If you are not sure of where the hollows are, just take a brush, place one end pointing towards the upper part of your ear, and the other towards your mouth. This will be a guide for you when you put on the contour, but remember not to apply the product all the way to your mouth!
STEP #5
Always blend your contour upwards. This will make your face look nice and structured. It is honestly a common makeup-mistake to blend it downwards, which ultimately results in an older, saggy appearance. Try to keep the product saturation right at the hollows and blend upwards.
PRO-TIP
After blending in, if your contour still looks harsh or muddy, just go back in with your foundation brush/blending sponge that has some foundation residue left and press it on top of the contour. This will blend everything together, giving you a more seamless look.
Photo: Collected

 For all latest news, follow The Daily Star's Google News channel.


Comments